

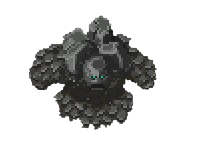
Act 1, The Mines: Stone Guardian
The stone guardian is the 1st boss in the game after working through the mines, he looks to be made of (you guessed it) stone.
Attacks:
- Stalagmite Shot: A linear spike shot that shoots forward in a straight line
- Stalactite AOE: The Stone Guardian slams the floor making giant chunks of rocks fall from the ceiling
- Bat minions: Bats will begin to spawn in waves once the boss reaches 66 percent of its health
- Overcharge: The boss will gain increased attack speed and stronger bats when reaching 33% of its health
NG+ and beyond:
Besides the usual increase in health in NG+ he also gains some new mechanics. The linear stalagmite attack gains the ability to home in on your character and the AOE ground slam shoots off a nova of tinier rocks from the boss’s position.
In NG++ each of the stalactites that fall from the ceiling will fire even more rocks.
Fighting the boss:
You can either use the rock formation around as cover from his linear shots or you can keep moving as his attacks aren’t very quick. It is very easy to dodge the AOE attack as big red circles are indicating where the attack will go. The bats can be dealt with easily with their low hp and slow attacks. All-n-all this boss is pretty easy if you keep moving.
Tips:
- Construct type (can get extra damage from items)
- You can not lifesteal from this boss
- Boss uses physical damage type making armor important for its damage reduction
- In multiplayer, the linear shot shoots out three lines instead of one.
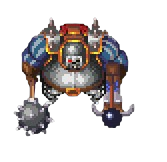
Act 2, The Prison: The Warden
After breaking all that sweet loot out of the prison cells it’s time to meet the head honcho of the prison, The Warden. Wielding a giant mace and a fast firing crossbow this boss will be a challenge for beginners.
Attacks:
- Spin attack: The warden unleashes his inner barbarian and starts his whirlwind while chasing you down
- AOE Melee: The warden will attack with his mace hitting the ground twice with a brief moment in between
- Crossbow Shot: This arrow does a high amount of damage but does not shoot it very accurately
- Skeleton Minions: Every so often a few minions will spawn on the top and bottom that can fire bolas at you that will root you in place for a couple of seconds, if you stand still these cannot hit you.
- Arrow Traps: At 66% health these arrow towers will spawn at the edges of the map and begin shooting arrows at you every so often, the more the bosses health goes down the faster these will shoot
NG+ and beyond:
In NG+ The Warden will begin to shoot a bunch of bombs while he’s in his whirlwind, these detonate after a few seconds. The bola minions also gain the ability to hit you while standing still.
Fighting The boss:
The easiest method is to maintain a close distance to the warden while he is spinning so that afterward you can do some damage and bait his mace attack. The mace attack is easy to dodge. You can just make a circle around him while attacking at close range, if you prefer range then just keep a close eye on where he is shooting the arrow. Make sure to clear out the minions when they spawn as one of their bolas can easily get you killed in this fight, take it slow, and don’t make any rash decisions. In NG+ the bombs can get a little scary but if you stick to the same tactic of circling him and keeping distance during the attack you will be fine.
Tips:
- Undead Type
- Primary attacks made by your hero can slow you down be careful attacking while he is spinning
- He only uses the crossbow if you are not close enough to get hit by his mace
- Warden uses physical damage
- In multiplayer bear traps can spawn around the map they can root you and do a tiny amount of damage
- Bola minions can also throw out bear traps if not taken care of
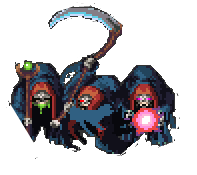
Act 3, The Armory: The Three Councillors
In this boss fight, you will be fighting the three councilors each with their specific attacks. The Councillor of War with his deadly scythe, the Councillor of Magic and his pink magic, as well as The Councilor of Wisdom who wields a staff.
Councilor of War Attacks:
- Scythe Swing: This is Wars normal attack where it swings a giant scythe in a small AOE around itself, this attack also sends out a little blue homing projectile spike.
- Enraged: On the Councilor of Magic’s death War will shoot 5 spikes instead of just the one
- Last One Standing: If both other councilors have been defeated War will start creating a pool of spikes that last a few seconds
Councilor of Magic Attacks:
- Pink Death: Magic’s main attack that requires a brief charge, this attack sends out a pink omnidirectional wave of projectiles
- Enraged: On the Councilor of Wisdom’s death the pink death attack will spawn an AOE burning ground effect on impact
- Last One Standing: If both other councilors have been defeated the burning ground effects will start firing Wars homing spike attack
Councilor of Wisdom attacks:
- Burning Pits: Wisdom will spawn many green fiery pools around the map, if you touch one you take damage and gain the burning debuff causing you to take DOT (Damage over time)
- Enraged: On the Councilor of Magic’s death the pools of fire start shooting 3 projectiles, on War’s death they will summon homing spikes instead.
- Last One Standing: If both other councilors have been defeated the pools of fire begin shooting 5 projectile as well as the homing spike from Wars attack
NG+ has no known changes besides the standard damage and health increase
Fighting the bosses:
This boss fight can be very tricky if you do not understand the fight. Each councilor has its own health bar and can only be damaged directly while they are attacking. They make wide sweeps around the map when moving and have an ethereal look when they cant be damaged. You must defeat all three to continue and each one gets bonuses as the others die. There are also 3 statues in a triangle formation that are linked to each boss, these can also be attacked to do damage to the councilors but I do not recommend them as they take reduced damage and attack you if you deal damage to them. There is not much else to say as it comes down to learning each one’s attacks and being prepared to move around a lot, do not stick in one corner in multiplayer together as it can congest attacks.
Tips:
- Undead Type
- There is both physical and magic damage in this fight
- Try not to focus on just one as it can make the fight harder later on
- The statues will continuously attack after the respective councilor has been defeated

Act 4, The Archives: The Watcher
This boss fight will have you fighting through several different phases to finally destroy The Watcher. These will be split into the five damaging phases and the four ritual phases. You start in the first damage phase and continue to rotate between the two. There is also an order mechanic for the ritual phases which is found through books you find during the Act 4 levels. It is not impossible to do without as you can guess the order but if you do not choose the right ritual you will have to repeat the ritual phase over and over until you get it right.
Boss Phase Attacks:
- Orb spinning: The Watcher has multiple orbs that constantly spin around his body at varying distances. The number of orbs increases for every damage phase completed. He has the ability to speed up the rotation
- Spiked Projectiles: The boss shoots several projectiles
- Summoning Traps: The Watcher creates AOE traps on the field that damage players inside them
Ritual Phase:
There are 4 different plates to choose from after the damage phase and you should know the order if you have collected the books during Act 4. Each one of these phases is a little different but they all summon a ton of little eye minions and eventually an elite eye minion. After you have spent a sufficient amount of time, the fight will go back to the damage phase and you will complete one of four ritual phases. The ritual phases are as follows:
North: Malign Transformation
- Random slices of the floor of the map will begin to glow a red color and deal damage to players that stand inside them
East: Blood Pact
- All eye minions gain the blood-lust buff which increases both their damage and speed
South: Embrace The Dark
- The arena will be shrouded in a dark fog making it harder to see
West: Withering Decay
- The eye minions will now leave poison on the ground that can poison a player that touches it
NG+ and beyond:
In NG+ the Watcher will receive new bonuses for every ritual you complete.
- Malign Transformation: The pillars in the room will fade in and out causing damage to players near them when reappearing and the damaging slices of the floor from the ritual will stay activating
- Blood Pact: For the rest of the fight all minions will receive the blood-lust buff
- Embrace The Dark: The room will continue to remain dark
- Withering Decay: For the rest of the fight all minions will leave the poison like during the ritual
In NG++ a confusion sphere will spawn when starting a ritual. This will follow a player around damaging them and causing the confusion debuff. Be careful as this can go through the pillars and walls.
In NG+++ The Watcher can now shoot his projectiles at a much higher rate at the cost of lower damage
Fighting the boss:
This boss sounds complicated but is honestly pretty easy once you know the mechanics. Just be aware of what each ritual can do and be prepared when the elite eye minions come out as they shoot a very fast straight laser attack but have a noticeable audio queue when they do so. During the damage phase don’t be afraid if you’re a melee character to get in there and do some damage at least until he speeds up its orbs. Take it easy and watch your first time fighting the watcher to understand his attacks and you will be killing him in no time,
Tips
- Aberration Type
- In multiplayer two elite eyes spawn instead of one
- In multiplayer, the orbs can be split differently for characters that are close and far
- Try to find all books during act 4 as it makes defeating the boss a little quicker
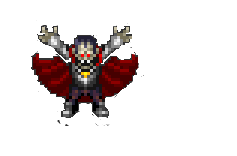
Act 5, The Chambers: Vampire Lord
The Vampire Lord is a pretty straightforward fight with only one unique mechanic that’s easy to understand. Just like the watcher this fight is made easier by collecting an item during the act. These are the crosses you will run into that are usually in a glass case in the middle of a room. You can use these during the fight to shield yourself from one of his attacks.
Attacks:
- Homing Blood Waves: The vampire lord swings his sword summoning blood waves around the map that home in on the player inflicting the bleed debuff, remember that bleed only affects you while moving
- Sword Shot: After pointing his sword towards you an arc of summoned swords will shoot out from where he is standing
- Mist of Blood: He will move into the center of the arena and create a room-wide mist of blood that damages any player not standing in an activated cross
- Pentagram of Fire: When the Vampire Lord reaches 33% health he will start creating a trail of blood fire as he dashes around the arena. This damages any player who touches these lines
NG+ and beyond:
NG++: the Vampire Lord will summon albino bats that attack the player when he reaches 33% health.
Fighting the boss:
You will have probably encountered him a little bit during act 5 as he spawns in and attacks the player occasionally. The homing blades are pretty easy to dodge and if you get hit remember to try and stand still as moving around can cause massive damage while you have a bleed inflicted. His sword shot attack can be easily avoided by circling him if melee or dodged by ranged characters. During the Mist of Blood try to only use at most half of your crosses as they cant be reused right away during the next attack. They require one phase to cool down. During the Mist of Blood, you can still damage the Vampire lord if you have range, so be sure to do so. You can also try to read where he is going during his Pentagram of Fire so you can be ready for when he stands still for a bit.
Tips:
- Undead Type
- Sometimes he will turn into a bat and move around the room, always ends up at one of the five pentagram points
- The Mist of Blood lasts a little longer after he starts moving so be careful not to leave too early
- In multiplayer, the Homing Blood Waves will have more waves
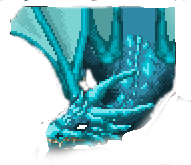
Act 6, The Battlements: Thundersnow
This is the final boss fight which just so happens to be a giant frost dragon.
Attacks:
- Icicle Shot: He shoots icicles from his mouth that travel in a straight line
- Wind Force: Thundersnow flaps his wings and blows the player back
- Lighting Strikes: He can summon lightning strikes around the map which can be seen from a reddish tint on your screen. This attack causes confusion
- Skycicles: Ice spears that fall from the sky that will summon either an ice barrier or an ice elemental
- Ice Balls: He fires off homing ice balls that will slow down the player
- Foot Stomp: He will stomp his big ole dragon feet causing an AOE near him that does MASSIVE damage
- Ice Breath: around 66 percent health Thundersnow will blow a giant cone of ice that gets bigger as it travels further down the map.
NG+ and beyond:
NG+: The ice elementals gain new abilities including a whirlwind attack as well as having more ice projectiles shot at the players
NG++: More icicles than ever before are shot
NG+++: The Foot Stomp attack now leaves the player with a stun
Fighting the Boss: Thundersnow can be very scary as most of his attacks do a lot of damage, if you are a melee character be sure to watch out for the foot stomp and keep yourself reminded of his health. If you are still near him when he does his ice breath it can practically one-shot you. Make sure to use the ice chunks around the map to stop yourself from getting blown back by his wind, these can also be used as cover from his attacks but most importantly the ice breath. Keep yourself moving at most times to avoid all the different projectiles and lightning and hit him when you can.
Tips:
- Beast Type
- Boots of Freedom can negate his wind
- In multiplayer more ice balls are sent out during the attack
- His Stomp attack alternates
- If the closest player to him is directly under Thundersnow he will not use his Ice Breathe, use this to your advantage when you start learning his attacks more


